

Installing an eye bolt and nut in concrete is a task that requires precision, the right tools, and a good understanding of the process. As a reliable supplier of high - quality eye bolts and nuts, I'm here to guide you through the entire installation procedure.
Understanding the Basics
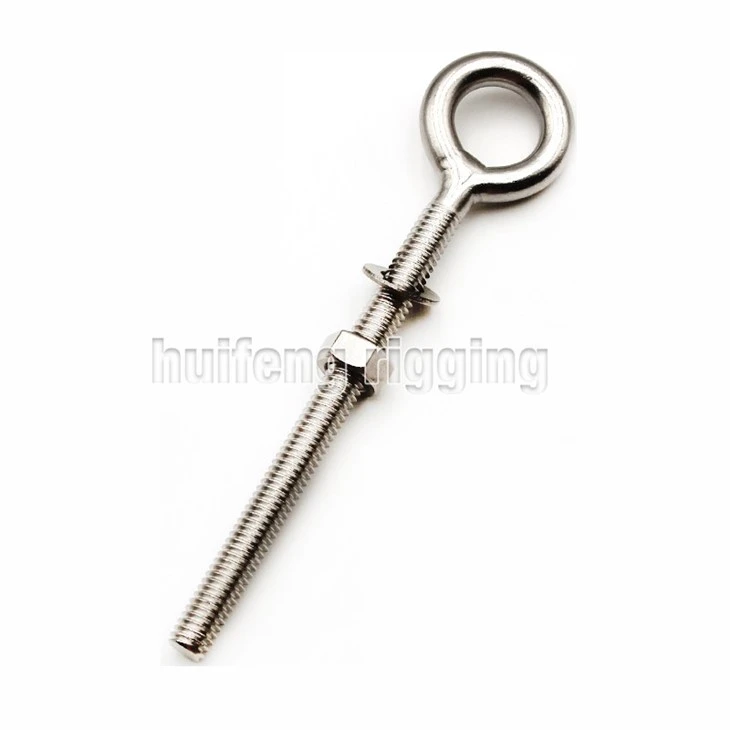
Before we start the installation, it's essential to understand what an eye bolt and nut are and their applications. An eye bolt is a bolt with a loop or "eye" at one end. This eye can be used to attach ropes, cables, or other hardware. The nut is used to secure the eye bolt in place. Eye bolts and nuts are commonly used in various applications, such as hanging equipment, supporting structures, and setting up shade sail systems.
We offer a wide range of eye bolts and nuts, including the DIN580 Eye Bolt, Eye Bolt Long Shank, With Washer & Nut, Welded, and Eye Bolt G277, With Washer And Nut. Each type has its own unique features and is suitable for different scenarios.
Tools and Materials Required
To install an eye bolt and nut in concrete, you'll need the following tools and materials:
- Drill and Masonry Bit: A drill with a masonry bit is essential for creating a hole in the concrete. Make sure the bit size matches the diameter of the eye bolt shank.
- Hammer Drill: If you're dealing with thick or hard concrete, a hammer drill will make the drilling process much easier.
- Eye Bolt and Nut: Choose the appropriate eye bolt and nut based on your application. Consider factors such as load capacity, length, and material.
- Wrench: A wrench is needed to tighten the nut onto the eye bolt.
- Vacuum or Brush: To clean the drilled hole before inserting the eye bolt.
- Epoxy or Concrete Anchor: Depending on the type of installation, you may need epoxy or a concrete anchor to secure the eye bolt in the concrete.
Step - by - Step Installation Process
Step 1: Mark the Location
The first step is to mark the exact location where you want to install the eye bolt. Use a pencil or marker to make a clear mark on the concrete surface. Consider the load requirements and the direction of the force that will be applied to the eye bolt. Make sure the location is free from any cracks, voids, or other defects in the concrete.

Step 2: Drill the Hole
Once you've marked the location, it's time to drill the hole. Insert the appropriate masonry bit into the drill. If you're using a hammer drill, set it to the hammer mode. Start drilling slowly at first to ensure that the bit stays in place. Apply steady pressure and keep the drill perpendicular to the concrete surface. Drill the hole to the required depth, which is usually about 1 - 1.5 times the length of the eye bolt shank.
As you drill, you may encounter some resistance, especially in hard concrete. If this happens, stop drilling periodically to let the drill bit cool down. Also, be careful not to drill too deep, as this can weaken the concrete structure.
Step 3: Clean the Hole
After drilling the hole, it's important to clean it thoroughly. Use a vacuum or a brush to remove any dust, debris, or concrete chips from the hole. This will ensure a good bond between the eye bolt and the concrete.
Step 4: Prepare the Epoxy or Concrete Anchor (if required)
If you're using epoxy or a concrete anchor, follow the manufacturer's instructions to prepare it. For epoxy, mix the resin and hardener in the correct ratio. For a concrete anchor, insert it into the drilled hole according to the instructions.
Step 5: Insert the Eye Bolt
Carefully insert the eye bolt into the drilled hole. If you're using epoxy, apply a small amount of epoxy to the shank of the eye bolt before inserting it. Make sure the eye bolt is straight and perpendicular to the concrete surface. Push the eye bolt all the way into the hole until it reaches the bottom.
Step 6: Tighten the Nut
Once the eye bolt is inserted, place the washer over the shank of the eye bolt on the concrete surface. Then, place the nut on the shank and use a wrench to tighten it. Tighten the nut until it is snug against the washer and the concrete surface. Be careful not to overtighten the nut, as this can damage the eye bolt or the concrete.
Step 7: Allow the Epoxy or Anchor to Cure (if used)
If you've used epoxy or a concrete anchor, allow it to cure for the recommended time. This can range from a few hours to a few days, depending on the product. During the curing process, do not apply any load to the eye bolt.
Step 8: Test the Installation
After the epoxy or anchor has cured, it's time to test the installation. Apply a small amount of load to the eye bolt to check if it is securely installed. If the eye bolt moves or shows any signs of instability, remove it and repeat the installation process.
Safety Precautions
Installing an eye bolt and nut in concrete can be dangerous if proper safety precautions are not taken. Here are some safety tips to keep in mind:
- Wear Protective Gear: Always wear safety glasses, gloves, and a dust mask when drilling into concrete. This will protect you from flying debris and dust.
- Use the Right Tools: Make sure you're using the correct tools for the job. Using the wrong tools can lead to accidents and damage to the equipment.
- Follow the Manufacturer's Instructions: Read and follow the manufacturer's instructions for all tools, materials, and products used in the installation process.
- Be Careful with Electricity: If you're using a power drill, make sure it is properly grounded and that you're using a GFCI (Ground Fault Circuit Interrupter) outlet.
Maintenance and Inspection
Once the eye bolt and nut are installed, it's important to perform regular maintenance and inspection. Check the eye bolt and nut periodically for any signs of wear, corrosion, or damage. If you notice any issues, replace the eye bolt and nut immediately.
Conclusion
Installing an eye bolt and nut in concrete is a straightforward process if you follow the right steps and use the correct tools and materials. As a supplier of high - quality eye bolts and nuts, we're committed to providing you with the best products and support. Whether you're working on a small DIY project or a large industrial installation, we have the right eye bolt and nut for your needs.
If you're interested in purchasing eye bolts and nuts or have any questions about the installation process, feel free to reach out to us. We're here to assist you with your procurement and answer any technical questions you may have.
References
- Concrete Construction Handbook, various editions
- Manufacturer's instructions for eye bolts, nuts, epoxy, and concrete anchors.